6.1 Basic movement of Jetbot Mini
Note: In the image operating system provided by Yahboom, the APP remote control process is enabled by default, in order to avoid multiple occupations of internal resources, causing some functions to fail to operate normally.
Before you running the code of this course, please follow the following to close the APP remote control process.
If you want to permanently close the function of the APP that starts automatically after booting, execute the following command:
sudo systemctl disable jetbotmini_start
If you want to permanently open the function of the APP that starts automatically after booting, execute the following command:
xxxxxxxxxxsudo systemctl enable jetbotmini_start
If you do not restart Jetbotmini to restart the APP function, execute the following command:
xxxxxxxxxxsudo systemctl stop jetbotmini_startsudo systemctl start jetbotmini_start
6.1.1 Create a robot instance to start your Jetbotmini
In the previous course, we have initially tried to make some classified applications through AI, and used all the driver packages of Jetbotmini to control the corresponding hardware on it. From this section on, we will officially start the AI integrated application to integrate our Jetbotmini gradually becomes a smarter robot step by step, so let's do it now!
In the previous course, we created Jetbotmini objects and used some of the methods to control some of Jetbotmini's hardware, such as individually controlling the rotation of the left and right motors. In fact, Jetbotmini also packs many methods to directly control the movement of Jetbotmini. Let’s take a look. Review some of the methods used in previous courses and discover more new ways to control the movement of Jetbotmini:
It is still the old rule before starting to use it, first import the Jetbotmini package and then create a robot instance that controls the movement of Jetbotmini, we can easily control Jetbotmini.
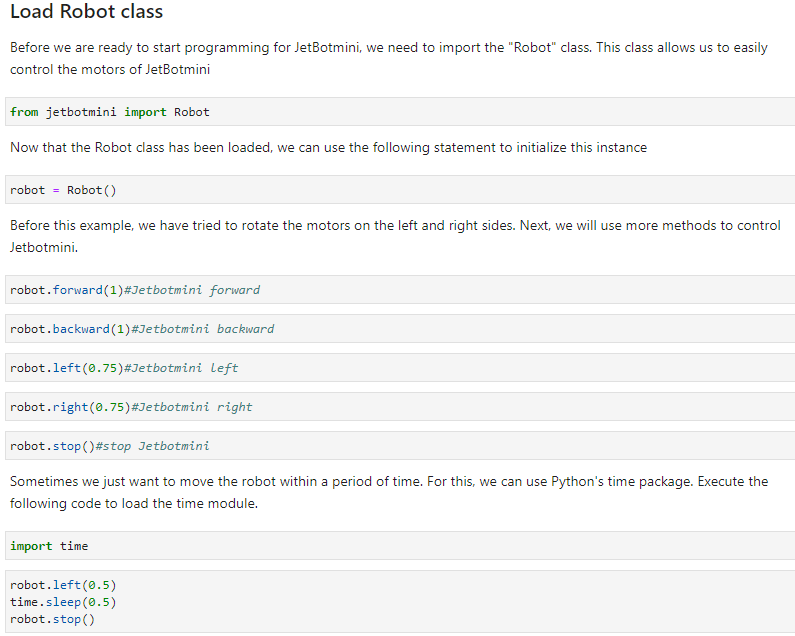
After running the above code, we should be able to see Jetbotmini move forward and backward at a maximum speed of 1, turn left and right at a speed of 0.75, and stop Jetbotmini.
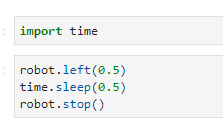
Sometimes we only want to move the robot within a period of time. For this, we can use Python's time package. The time module is often used to save system resources when creating a new thread to handle some small tasks. We will execute the following cell code Seeing Jetbotmini turn left, it stopped.
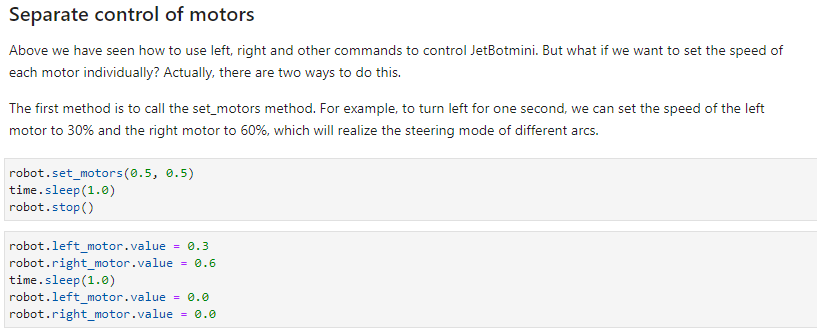
In addition to setting the value of robot.left_motor.value used in the previous courses to control the motor individually, there is also robot.set_motors(Left_Motor_Value, Right_Motor_Value) method. They achieve the same effect, but robot.set_motors (Left_Motor_Value, Right_Motor_Value) method is used a bit more, because you can set the speed of the two motors at one time, which is more convenient:
The corresponding complete source code is located:
/home/jetson/Notebooks/English/8.Control_jetbotmini_motion/Control_jetbotmini_motion.ipynb
6.1.2 Comprehensive interactive use of ipywidgets controls and traitlets
Before using ipywidgets and traitlets, let’s get to know them briefly.
ipywidgets:
Those who have written APP will definitely be familiar with widgets. As the name suggests, it means widgets/widgets. In the interactive interface between APP and us, most of us use it to complete the interaction, and what we want to use now Ipywidgets, if you have ever created a graphical user interface (GUI), then you already know what a widget is. But let's quickly define:
ipywidgets widgets are GUI elements, such as buttons, drop-down menus or text boxes, which reside in the browser, allowing us to control code and data by responding to events and calling designated handlers. Each widget has its own specificity. The attributes to deal with some data information.
for example:


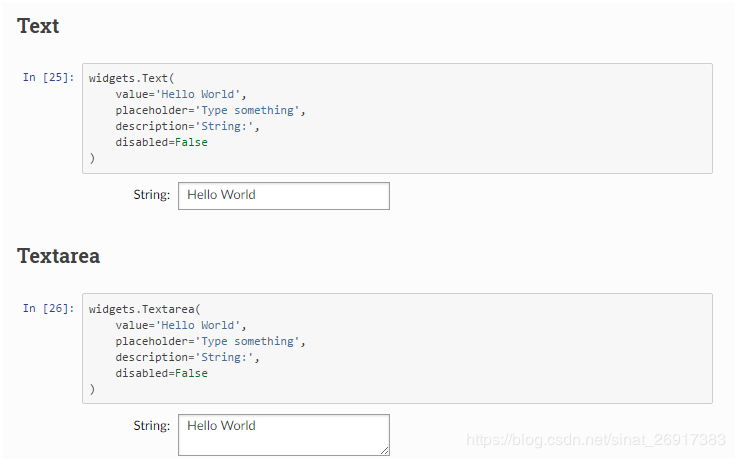
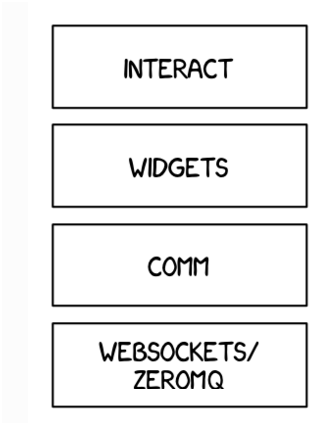
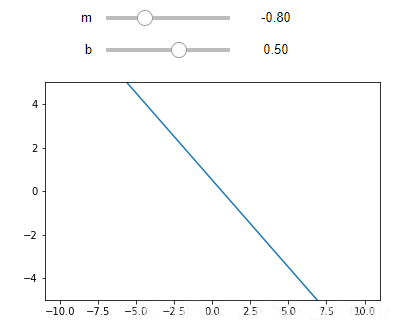
In addition to some of the components listed above, ipywidgets also has a lot of component tools that are super convenient to use because the length is not listed one by one, waiting for us to slowly explore and discover in future use!
traitlets:
Traitlets is a framework that allows Python classes to have type checking, dynamically calculated default values, and "on change" callback properties.
The package also includes a mechanism for configuration using traitlets, loading values from files or command line parameters. This is the unique layer on top of the traitlet, so you can use the traitlet in your code without using the configuration mechanism.
When we debug Jetbotmini robots, we bind components and data together through ipywidgets and traitlets, which can be called back and refreshed in real time in the background, which can greatly improve our debugging efficiency. I think this is like an artifact!
Let's make preliminary use of them step by step:
First import the relevant package, create two sliders, define its properties when creating the sliders.
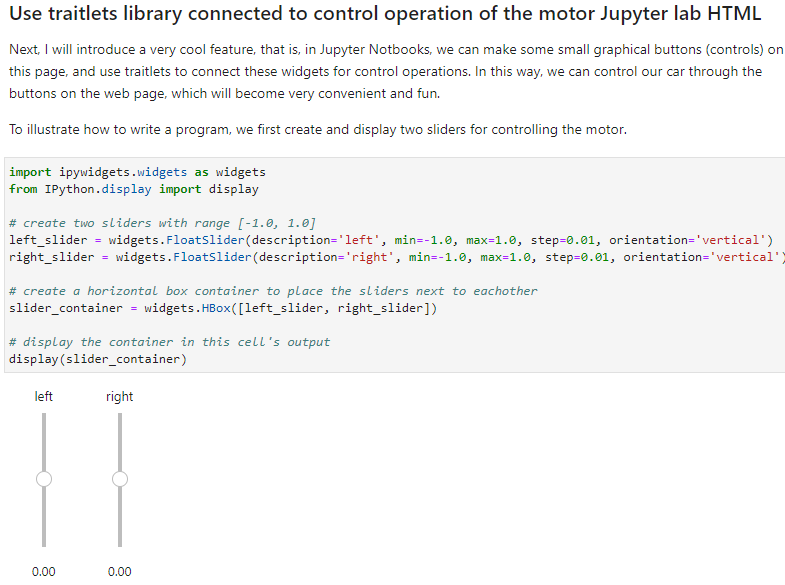
After running the above code, you should see two vertical sliders displayed on it.
Tips: In Jupyter Lab, you can actually pop up cells to other windows, such as these two sliders. Although it is not in the same window, it is still connected to this notebook. The specific operation is to move the mouse to the cell and right click (for example: slider), select "Create new view for output" (create a new window for output), and then drag the window to the place you are satisfied with.
Try to click and drag the slider up and down, you will see the value change. Please note that currently, Jetbotmini's motors do not respond when we move the slider, that's because we haven't connected them to the motors yet! Below we will achieve this by using the link function in the traitlets package.

Now try to drag the slider (slowly drag it first, so as not to cause damage when your Jetbotmini suddenly rushes out of the border), you should see the corresponding motor rotating!
The link function we created above actually creates a two-way link! That means, if we set the motor value elsewhere, the slider will update accordingly! Try to execute the following code block:

After execution, you should see that the slider has also changed, responding to the speed value of the motor. If we want to disconnect this connection, we can call the unlink method to disconnect one by one.

After disconnecting, they return to the state where there was no connection at the beginning, but if we don’t want a two-way connection, for example, we only want to use a slider to display the speed value of the motor, but not for control, then To achieve this function, we can use the dlink function, with the source on the left and the target on the right (the data comes from the motor, and then it must be displayed on the target).

Another way to use traitlets that I want to introduce is to attach functions to events (for example, forward). As long as there is a change to the object, the function will be called, and some information about the change will be passed, such as the old value and the new value.
Let us first create some buttons to control the robot to display on the notebook:
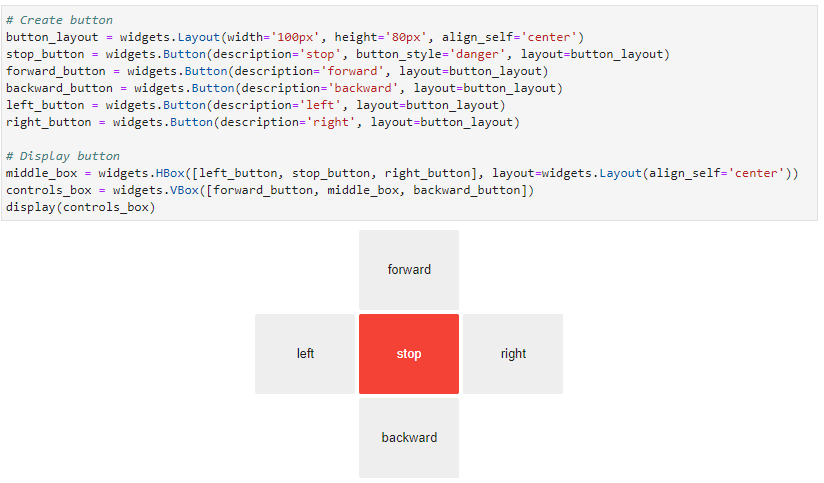
After executing the above cell code block, you should see a set of robot control buttons shown above, but now you click the button and nothing will happen. To achieve control, we need to create some functions attached to the button on_click event
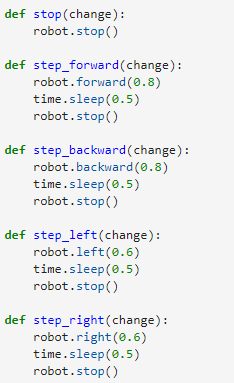
Now that we have defined those functions, let's attach these functions to the on_click event of each button
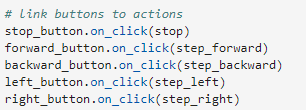
After executing the above cell code, we can now control Jetbotmini to move forward, backward, turn left, turn right and stop by clicking the button component we created above.
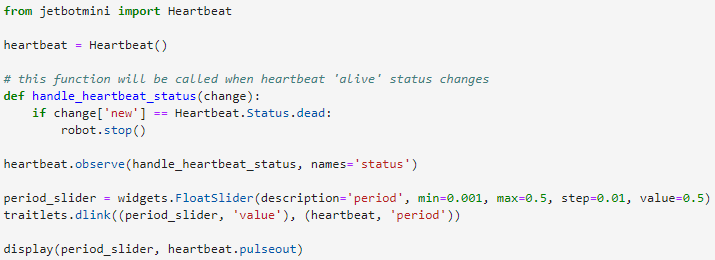
Then, in order to prevent Jetbotmini from being out of control and causing damage when the signal of the connected Jetbotmini is disconnected, Jetbotmini also provides a method to solve this problem, that is, the heartbeat switch function:
The following cell code block will introduce how to use the ‘heartbeat’ package to stop Jetbotmini’s movement. This is an easy way to check if the connection between Jetbotmini and the browser still exists. The heartbeat cycle (in seconds) can be adjusted by the slider created and displayed after executing the cell code. If the browser cannot communicate back and forth within two heartbeats, then the'status' attribute of the heartbeat The value will be set to dead, and once the connection is restored, the status attribute will be set to alive.
The corresponding complete source code is located:
/home/jetson/Notebooks/English/8.Control_jetbotmini_motion/Control_jetbotmini_motion.ipynb